Banana Pi / Pro 3.5″ TFT LCD Module Review
Installing the flex cable
The first thing I did was install some stand-offs so that I could have the display stand on its own, or be placed on top of the Banana Pi.
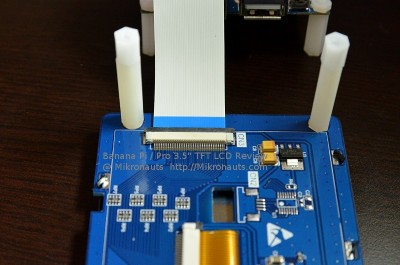
Installing the FPC cable is a bit tricky, but needs no more than three hands (kidding).
- Gently pull out the brown cable clamp at both ends
- Carefully push the FPC cable in, make sure it is straight and that the “silver” conductive fingers face down towards the PC board, and “blue” tape faces up.
- After the cable is fully in, push down on both sides of the cable clamp at the same time. (This is where the third “gripping” hand is handy)
(Click on image for larger version)
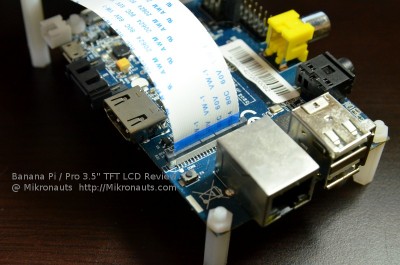
(Click on image for larger version)
Installing the FPC cable on the Banana Pi is pretty much the same as installing it on the LCD module above.
- Gently pull out the brown cable clamp at both ends
- Carefully push the FPC cable in from the top, make sure it is straight and that the blue protective tape faces the Ethernet jack, and the “silver” conductive fingers face away from the jack.
- After the cable is fully in, push down on both sides of the cable clamp at the same time. (Again, a third “gripping” hand is handy)
That’s pretty much all that is required for hardware installation!
You can stack the LCD module on top of the Banana Pi, or simply mount it beside the Banana Pi.
If you would like a longer FPC cable, they are readily available in lengths up to 300mm on EBay, search for “FPC cable 40 0.5mm”
Installing the driver
I must admit, I had some issues getting the display running, due to a lack of documentation. Tony and Peter at Lemaker were very helpful, and got me up and running in short order.
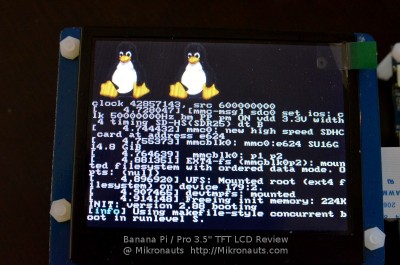
Here is Linux booting on the Banana Pi:
(Click on image for larger version)
I basically had two problems with getting the LCD running:
- Web browsers did not download the ‘bin’ drivers properly, I should have used git as usual
- The README.md file on github did not mention having to uncomment the lcd line in /etc/modules
Tony pointed out the driver size issue, and Peter actually tried installing it from scratch on his end, and sent me step-by-step instructions for his install.
Here is an expanded version of Peter’s installation instructions:
- Do a fresh install of Raspbian 3.1 from Lemaker.org
- open a terminal window
- cd /boot/bananapi
- sudo wget -c https://raw.
githubusercontent.com/LeMaker/ fex_configuration/master/banan a_pi_35lcd.bin - sudo cp banana_pi_35lcd.bin script.bin
- edit /etc/modules with your favorite editor (with sudo, ie “sudo vi /etc/modules”), uncomment ‘lcd’ (remove the ‘#’ in front of it)
- sudo reboot
Now once I got that running, I went back to my previous Raspbian 3.1 install, as I wanted to get the LCD running on the SD card I use RoboPi with 🙂
Here is how to install the 3.5″ LCD on an existing Raspbian 3.1 installation on a Banana Pi:
- open a terminal window
- git clone https://github.com/LeMaker/fex_configuration
- cd fex_configuration/
- sudo cp banana_pi_35lcd.bin /boot/bananapi/script.bin
- edit /etc/modules with your favorite editor (with sudo, ie “sudo vi /etc/modules”), uncomment ‘lcd’ (remove the ‘#’ in front of it)
- sudo reboot
If the above does not work for you, you may have to do
- sudo apt-get update
- sudo apt-get upgrade
Note that if you have ssh enabled, you can ssh in instead of opening a terminal window.
Article Index


