Raspberry Pi 1602 and 2004 LCD Interfacing
Raspberry Pi with 1602 Character LCD Module
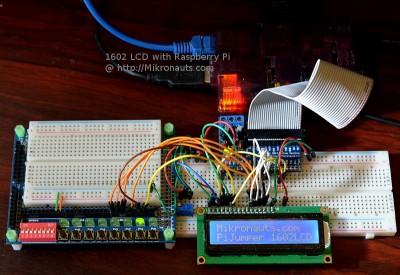
Here is what a 1602 LCD looked like, connected to a Raspberry Pi using a larger breadboard and Pi Jumper.
Note the extra wires going to the SchoolBoard ][ on the left, which I needed to use to diagnose a problem (fried GPIO#18).
(click on image above for larger version)
Here is the code snipped that generated the display above:
  lcd = lcd_module(1602, 17, 27, 25, 24, 23, 22)
  lcd.str("Mikronauts.com")
  lcd.disp(0,1,"PiJumper ")
  lcd.dec(lcd.type)
  lcd.str("LCD")
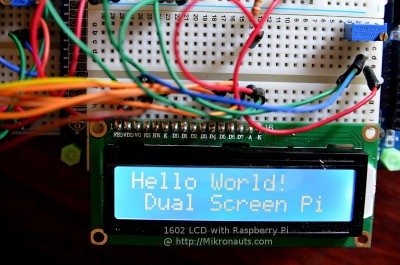
Here is a close up of the 1602 display after I moved it to the smaller breadboard:
(click on image above for larger version)
Here is the code snipped that generated the display above:
  lcd = lcd_module(1602, 17, 27, 25, 24, 23,22)
  lcd.str("Hello World!")
  lcd.disp(1,1,"Dual Screen Pi")
Raspberry Pi with 2004 Character LCD Module
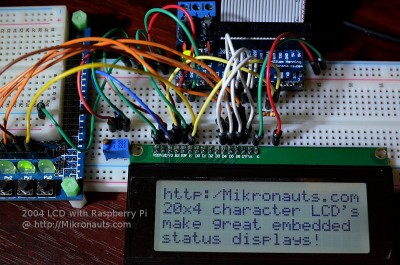
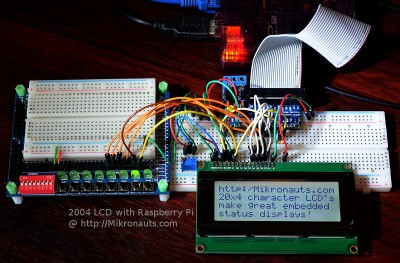
Here is what a 2004 LCD looked like, connected to a Raspberry Pi using a larger breadboard and Pi Jumper.
(click on image for larger version)
Here is the code snipped that generated the display above:
  lcd = lcd_module(2004, 17, 4, 25, 24, 23,22)

  lcd.disp(0,0,"https:/Mikronauts.com")
  lcd.disp(0,1,"20x4 character LCD's")
  lcd.disp(0,2,"make great embedded")
  lcd.disp(0,3,"status displays!")
Now obviously, the code snippets above depend on a library to communicate with the LCD, namely MikEzLCD.py 🙂
(click on image for larger version)
Introducing MikEzLCD.py class library
MikEzLCD.py implements a Python LCD class to control character LCD’s using the excellent RPi.GPIO library.
In order to control a character LCD module, you have to instantiate an lcd_object, specifying the LCD module type, register select pin, e clock pin, and the pins connected to the upper four data bits of the LCD module.
Currently two types of LCD modules are supported, and have confirmed to work with this class:
- 1602 module – two rows of sixteen characters
- 2004 module – four rows of twenty characters
Due to the nature of the HD44780 (and compatible) LCD controllers used on character modules, it is likely that the following additional types of displays would work with the library unmodified:
- 0801 module – one row of eight characters
- 0802 module – two rows of eight characters
- 1202 module – two lines of twelve characters
- 1601 module – one line of sixteen characters
- 2002 module – two lines of twenty characters
- 2402 module – two lines of twenty four characters
- 4002 module – two lines of fourty characters
Other modules that total no more than 80 characters total (rows * columns) would work if the memory addressing in the lines variable within the lcd_module was adjusted as needed.
To use the lcd_module class, first you have to instantiate it. Here is how we do that for a 1602 display:
lcd = lcd_module(1602, 17, 27, 25, 24, 23, 22)
As you can see, the first argument specified the module type. The rest of the arguments specify the Raspberry Pi GPIO pins used to connect to the module:
lcd = lcd_module(module_type, RS, E, D7, D6, D5, D4)
Please see the “Connecting the LCD” section of the article to see how to physically wire the LCD module to the Raspberry Pi.
Once you have instantiated your LCD object, you can communicate with the LCD module using the following public methods:
- cmd(byte) – send specified command byte to the module
- chr(byte) – send specified data byte to the module
- cls – clear the LCD screen
- home – move the cursor to row 0, character position 0
- setxy(x,y) – move the cursor to character x on row y
- str(string) – write the bytes in the string to the display
- disp(x,y,string) – write the string at specified position
- dec(val) – write integer as decimal number
- oct(val) – write integer as octal number
- hex(val) – write integer as hexadecimal number
- float(val) – write floating point value
Please note, there is basically no error checking performed at this time, so try not to write outside of the screen boundaries, and bad things can happen with invalid values.
Article Index:


