LeMaker Guitar Review
Hardware Compatibility
The Guitar Base Board rev.B has:
- 40 pin GPIO header compatible with Raspberry Pi 2/A+/B+ and Banana Pro
- 6 pin uart + ADC header
- 40 pin LVDS LCD flex cable connector
- 40 pin camera connector
- RTC battery connector mounting holes
Update Dec.18: Good news! I just read on the LeMaker forum that the connectors are for the 40 pin flex cables like on the Banana Pi & Pro! I based my earlier report on the schematic showing 42 pin connectors, as they listed the tabs as well. Apparently the Banana Pi Camera and the 7″ Banana Pro LCD is compatible with the Guitar Base Board. (The 3.5″ and 5″ displays are not compatible as they are not LVDS displays)
Recently, LeMaker has also made available ports of WiringPi and RPi.GPIO
The wiki has instructions on how to download and install the two libraries, I following the provided instructions, and they installed cleanly.
Looking at the two pin lists, I predict LeMaker will be releasing new Camera and LCD modules, as the pinouts don’t seem to match!
Good thing I did not try my 7″ Banana TFT!
There is an interesting six pin debug serial + ADC connector that appears to bring out UART3 and ADC0.
Serial Port
To get the serial port on the GPIO header working without sudo, you need to add lemaker to the dialout group:
sudo adduser lemaker dialout
reboot and you can use /dev/ttyS0 without needing root priviledges.
I2C
To get I2C working:
sudo apt-get install i2c-tools
sudo insmod /lib/modules/3.10.37/kernel/drivers/i2c/i2c-dev.ko
Eventually you should add i2c-dev to /etc/modules so that you do not have to manually insmod it every time you reboot.
sudo i2cdetect -y 2
Will show you i2c chips you connect to the I2C bus on the GPIO header.
USB 3.0
From what I understand, the current USB 3 performance on the Guitar is limited to ~100MB/sec even with SSD’s in a USB3 SATA enclosure.
I will be running my own tests on USB 3 on the Guitar to verify this, and look for possible improvements.
Once I have my results, I will update this review.
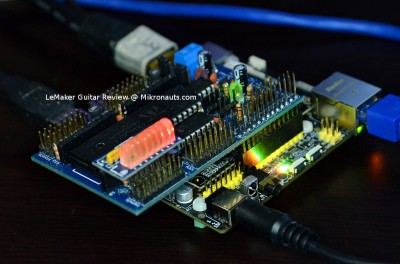
RoboPi
(click on image for larger version)
RoboPi works great on the Guitar with base board!
All I had to do was:
- stack RoboPi on top of the base board
- download the libraries
- use the GPIO utility to set BCM GPIO#17 to 1 (to bring RoboPi out of reset)
- change the C and Python demo code to refer to /dev/ttyS0 (instead of /dev/ttyAMA0)
The RoboPi demos worked right away!
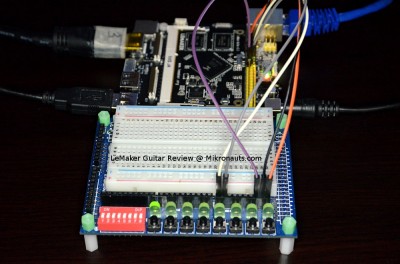
SchoolBoard ][
(click on image for larger version)
I used SchoolBoard ][ to test WiringLMK, LeMakers port of wriringPi.
using the gpio command line utility I turned GPIO#17 on and off, and by cat’ing a large file to /dev/ttyS0 I also saw TX blink.
gpio -g mode 17 out
gpio -g write 17 1
gpio -g write 17 0
I normally use SchoolBoard ][ when playing small circuits.
(click here for SchoolBoard ][)
Article Index
- Introduction
- A Closer Look at LeMaker Guitar & Base Board
- Feature Comparison
- Operating Systems, Software Compatibility
- Common Applications, WiFi, Bluetooth
- Hardware Compatibility
- More on Hardware Compatibility
- Benchmarks: Booting&Apps, Compiling Emacs, Sysbench
- Benchmarks: iperf client & server, NBench, UnixBench
- Benchmarks: hdparm, dd, Documentation, Support, Conclusion

