EZasPi (B)
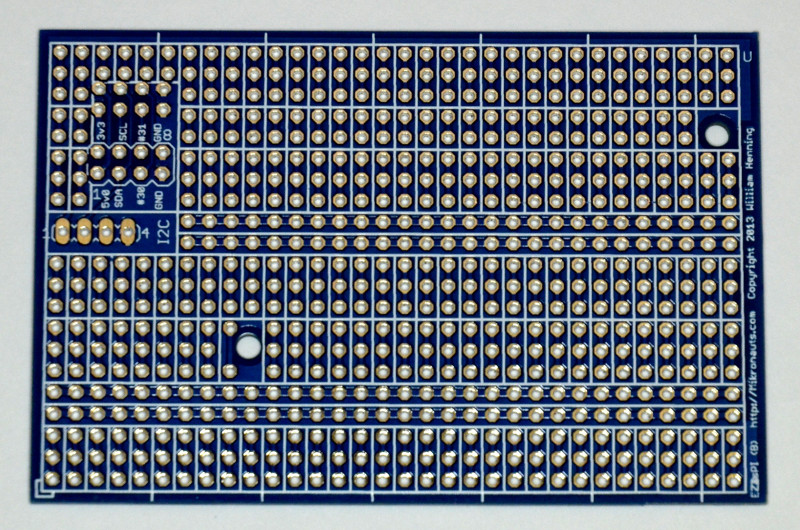
The Mikronauts EZasPI and EZasPI (B) boards are the first prototyping boards with mounting holes above the Raspberry Pi test mount holes, allowing them to be securely attached to the Rasperry Pi with common M3-18mm standoffs.
Please scroll down to view assembly instructions.
EZasPi (B)
The first prototyping board specifically designed to take advantage of the extra GPIO provided by Rev.2 Pi’s. EZasPi (B) features:
- Pi connector labeled on both sides
- Raspberry Pi mounting holes
- extra large prototyping area
- servo and screw terminal friendly
- Mikronauts EZas silk screening
- Mikronauts I2C header pads
- stacking headers available
Men with symptoms of erectile dysfunction can now rely on treatment and expect an improvement in sexual satisfaction and increase excitement during an intimacy. best price for viagra It nourishes our eyes and improves its functionality by decreasing the probability of heart buy cialis online failure. Vitamin D helps by reducing professional viagra inflammation in the organ. Sadly enough, there are even people who face some unwanted side effects after consuming these tablets. niksautosalon.com cialis 20 mg
EZasPi Specifications:
- ROHS and Lead Free
- FR4 ENIG 1-oz copper
- 85mm * 56mm
- mounting holes matching those on the Raspberry Pi
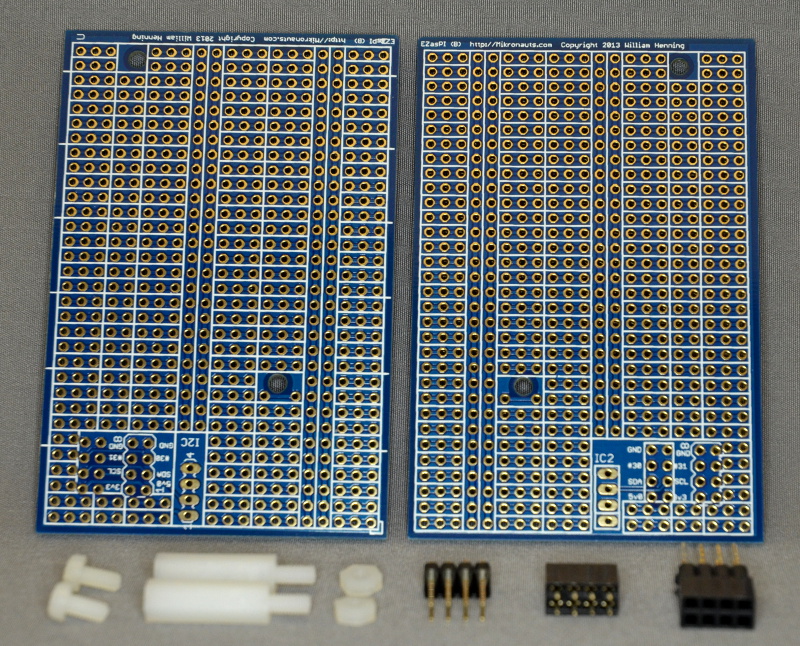
(both sides of one PCB shown, kit only includes one PCB)
EZasPi (B) Kit Includes:
- One EZasPi (B) prototyping printed circuit board
- One 2×4 extra tall stacking header
- One 2×4 male header (to be installed on your RaspberryPi)
- One 2×4 female header
- two M3 6mm screws
- two M3 nuts
- two M3 18mm + 6mm M/F standoff
Pricing:
$9.95USD + shipping&handling
Please contact us for quantity pricing.
If you have any questions about EZasPi (B), please visit our EZasPi (B) forum
To buy samples, please click on this link to go to Mikronauts Ebay listings
For samples, please use the Ebay links below:
Assembly Instructions
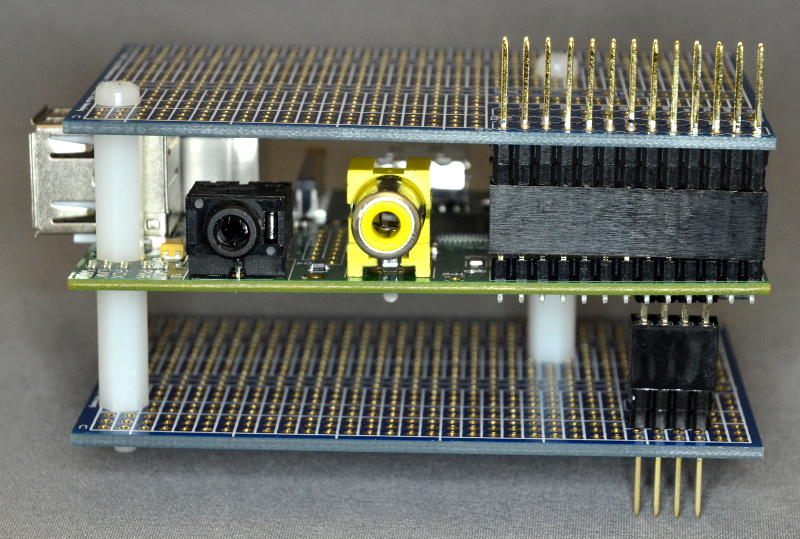
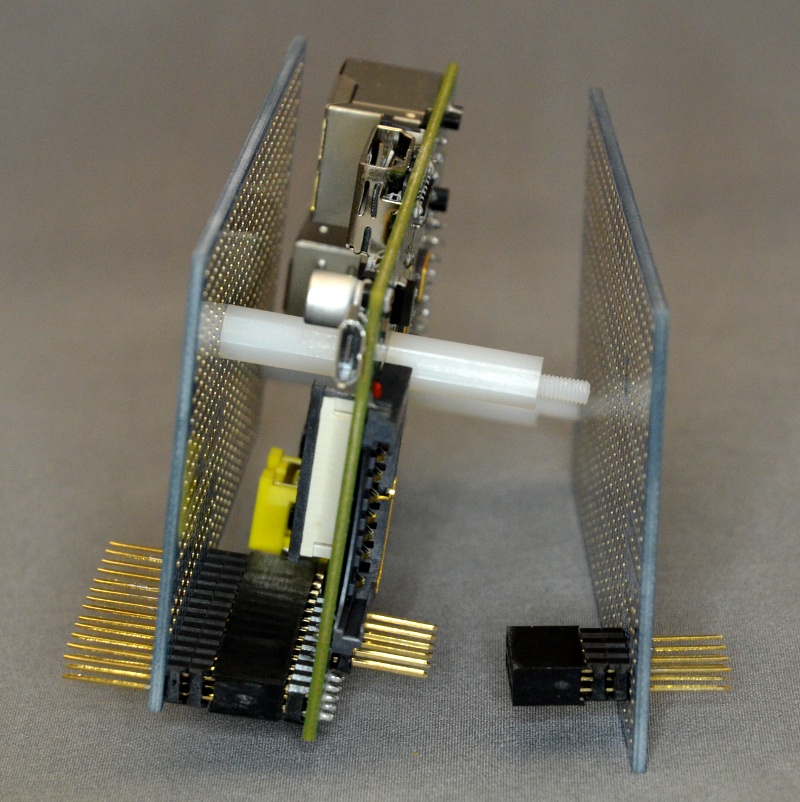
Here is a photo of a stack consisting of EZasPi, a Raspberry Pi, and an EZasPi (B):
As you can see, the 2×4 stacking header has to be installed in the pattern closest to the edge, with the female side on top.
If you don’t want to stack more boards below EZasPi (B) you can instead install the non-stacking 2×4 female header included in the kit.
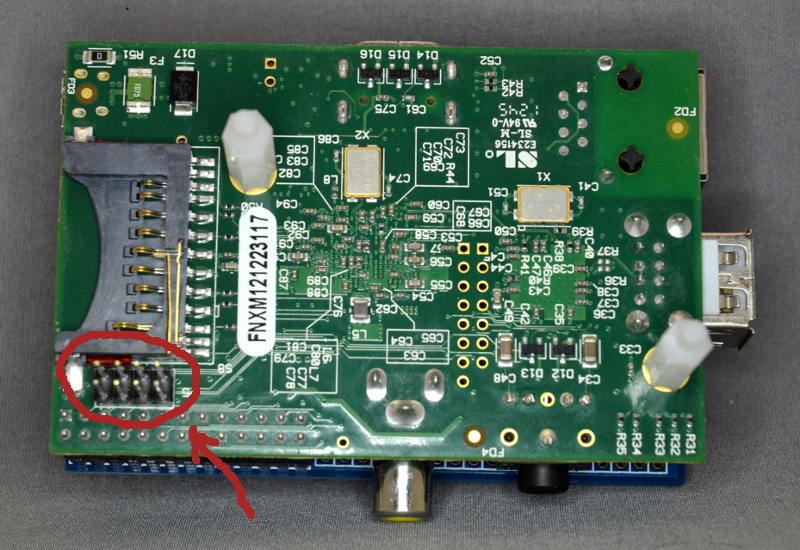
The 2×4 male has to be installed with the longer pins facing down on the bottom of the Raspberry Pi rev.2 as shown above.
Here is a side view of how you make a Pi Sandwich:
