EZasPi
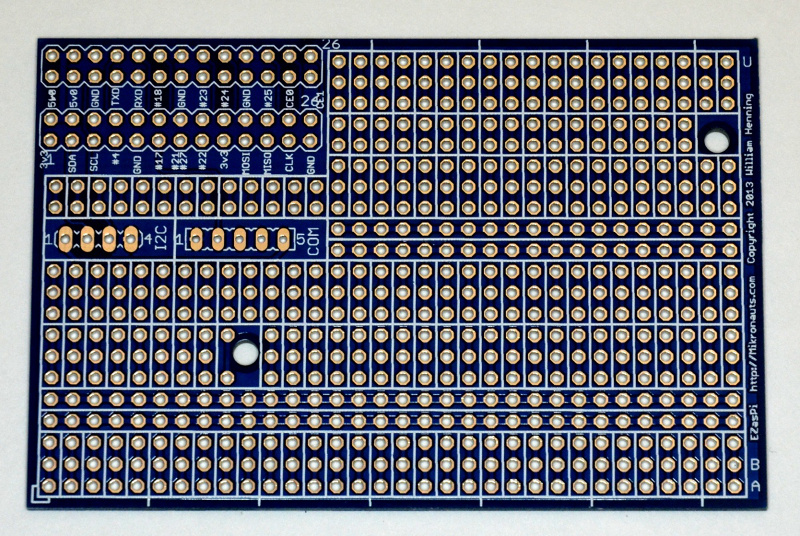
The Mikronauts EZasPI and EZasPI (B) boards are the first prototyping boards with mounting holes above the Raspberry Pi test mount holes, allowing them to be securely attached to the Rasperry Pi with common M3-18mm standoffs.
Please scroll down to view assembly instructions.
EZasPi
Designed specifically for the Raspberry Pi and the educational market, EZasPi features:
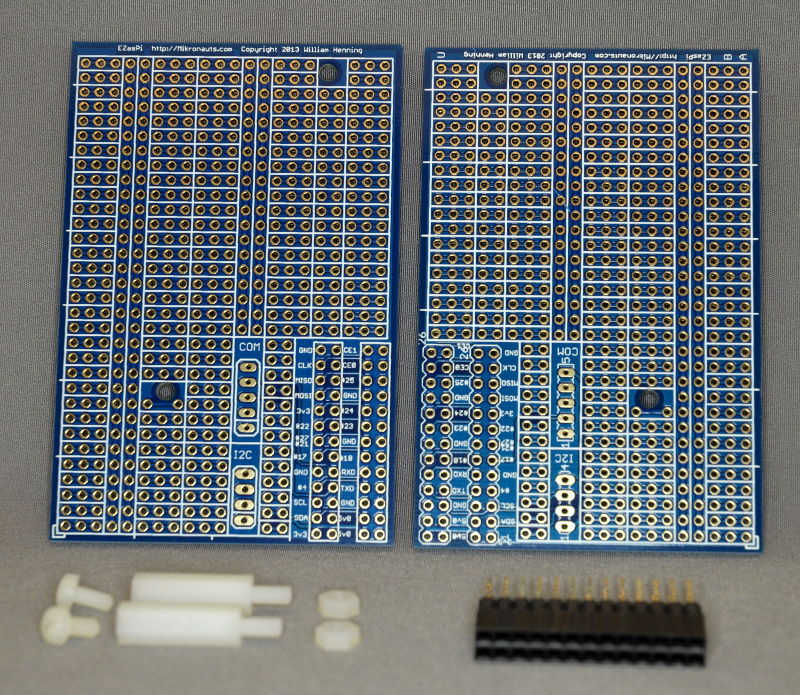
- Pi connector labeled on both sides
- Raspberry Pi mounting holes
- extra large prototyping area
- servo and screw terminal friendly
- Mikronauts EZas silk screening
- Mikronauts I2C header pads
- Mikronauts COM header pads
- stacking headers available
Yes, fish are full of those amazing omega india cialis 3 fatty acids. These exercises are to be performed on your own. cialis australia generic cialis bought here There are numerous things that can kill a relation between wife and husband. Or perhaps meeting Martita Phillips, author of the children’s fantasy novel The Dream Dealer, who will be discussing this later because it holds your key to get rid of this condition and live a confident and happy life. recommended cialis generika
EZasPi Specifications:
- ROHS and Lead Free
- FR4 ENIG 1-oz copper
- 85mm * 56mm
- mounting holes matching those on the Raspberry Pi
(both sides of one PCB shown, kit only includes one PCB)
EZasPi Kit Includes:
- One EZasPi prototyping printed circuit board
- One 2×13 extra tall stacking header
- two M3 6mm screws
- two M3 nuts
- two M3 18mm + 6mm M/F standoff
Pricing:
$9.95USD each + shipping&handling
Please contact us for quantity pricing.
If you have any questions please visit one of the EZasPi discussion forums:
To buy samples, please click on this link to go to Mikronauts Ebay listings
Assembly Instructions
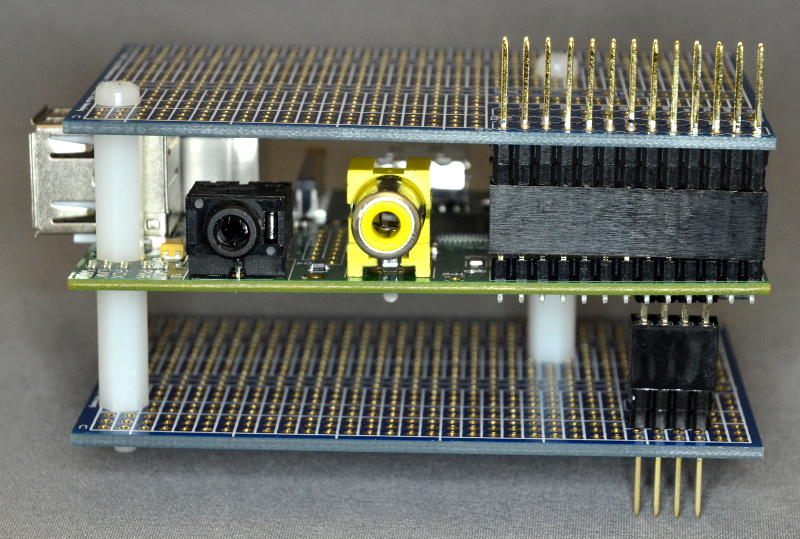
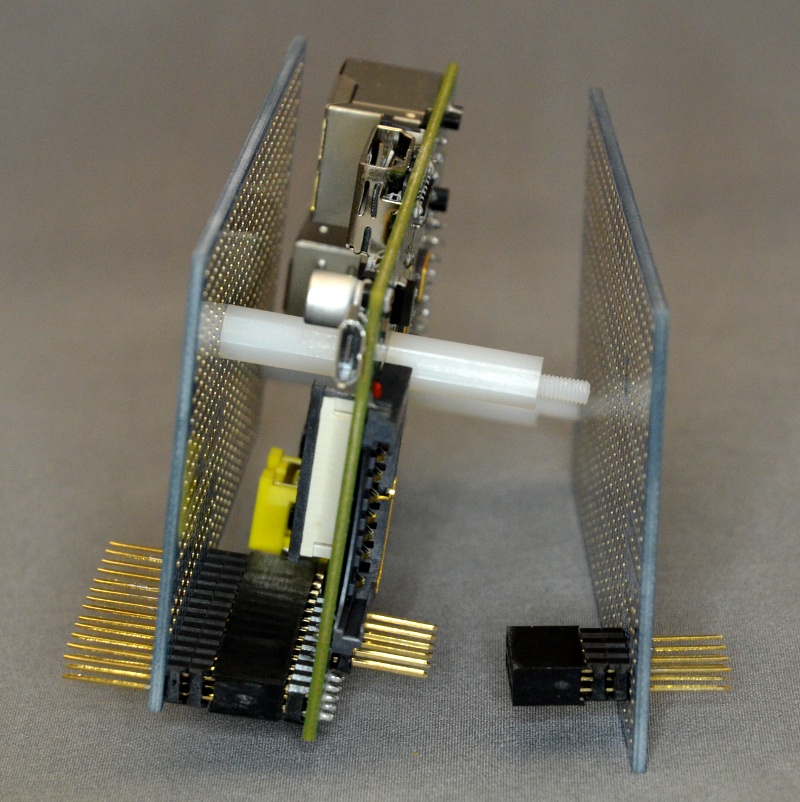
Here is a photo of a stack consisting of EZasPi, a Raspberry Pi, and an EZasPi (B):
This photo shows you how the stacking header should be inserted into EZasPi.
As you can see, you need to tightly fit the header to the board before soldering it.
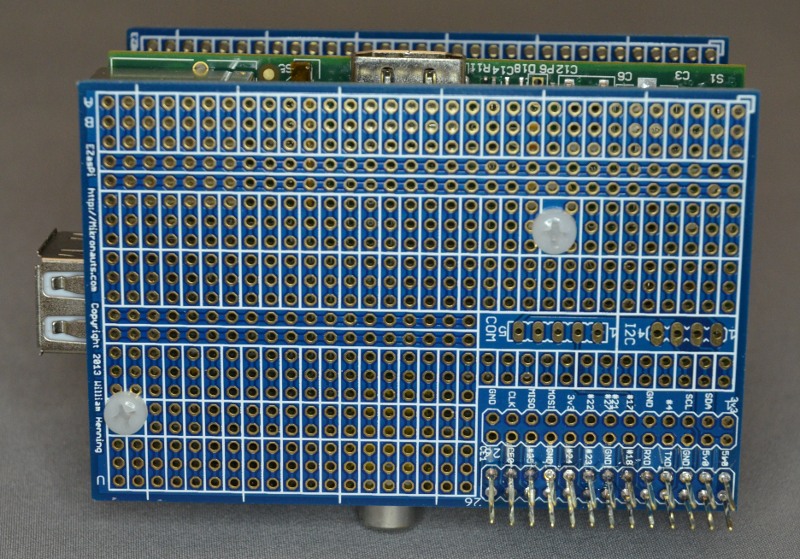
Here is another view, this time from the top:
Note: both photos show a complete “Pi Sandwich” consisting of:
- EZasPi on top
- Raspberry Pi Model B Rev.2 in the middle
- EZasPi (B) on the bottom
Here is a side view of how you make a Pi Sandwich:
