Raspberry Pi IoT Experiment #1: LDR and ThingSpeak HowTo
The Internet of Things (IoT) is the “next big thing” – and given the Raspberry Pi’s low price and great community, it is a near ideal platform for IoT experiments.
(click on image for larger version)
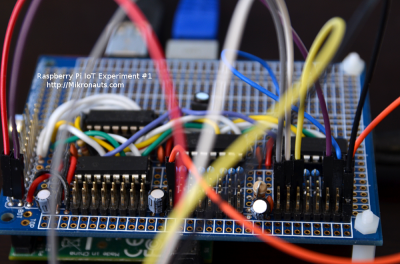
In “Raspberry Pi Analog to Digital Conversion Experiments and Howto” I built a reasonably high precision data acquisition board for my Raspberry Pi’s – 1mV per bit for 0-4.096V signals, and 2mV per bit for 0-8.192V signals – which I will use for experimenting with sensors for IoT applications.
You can use any analog to digital converter for experiments – the MCP3008 10 bit converter running at 3.3V from the Raspberry Pi’s 3.3V power rail (and also using it as Vref) would work just fine for most inexpensive resistance based sensors.
With the introduction of the Raspberry Pi 2 Model B, I find myself with quite a few Raspberry Pi Model A/B/A+/B+ boards that need to be re-purposed, and using them for IoT experiments sounds like a good plan!
The ready availability of IoT visualization and storage services “in the cloud” will allow me to share both static images and “live” feeds.
I recently quickly evaluated using InitialState for my experiments, but found that while the visualizations are nice, the free account is too limited for my needs. and the paid accounts would cost too much for my purposes.
Subsequently I took a quick look at Temboo IoT service, and as far as I can tell, it would be even more expensive than InitialState.
For now, I will be using the open-source ThingSpeak platform as it is free, and allows updates every 15 seconds. Don’t be surprised if later experiments will try other platforms!
ThingSpeak.com: Free IoT logging & visualization HowTo
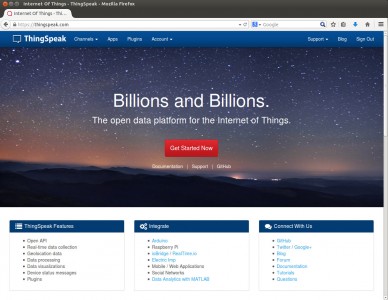
I have been playing with ThingSpeak for a few of weeks now, and I think it is a great IoT storage and visualization platform for most maker projects.
(click on image for larger version)
After creating your account, you can create channels for your data. ThingSpeak.com has an excelent Support section, with plenty of tutorials to help you get started.
Each channel can have up to eight fields, and be flagged as “Public” (so everyone display the data for the channel) or as “Private” so only you can see the data.
The default visualization is a page showing a simple chart for each channel, and you can configure the name of the chart, and axes for each chart.
The simplest way of uploading data is a specially encoded URL:
https://api.thingspeak.com/update?key=XXXXXXXXXXXXX&headers=false&field1=0.49&field2=2.186&field3=0.006&field4=0.006&field5=0.006&field6=3.312&field7=4.094&field8=4.898
- Replace XXXXXXXXXXX with the private update key you get for your channel
- field1=value1&….&field8=value8 it is REALLY simple to log data to your channel!
I re-organized the analog inputs on channel 1 of my data acquisition board as follows:
| ADC Chan | Function |
| 0 | LDR with 1k pulldown resistor |
| 1 | LDR with 10k pulldown resistor |
| 2 | LDR with 100k pulldown resistor |
| 3 | not used |
| 4 | not used |
| 5 | Rpi 3v3 power rail on GPIO headerthingspeak.py |
| 6 | 4.096V precision reference output |
| 7 | Rpi 5V power rail on GPIO header |
As a result, it would also be very difficult for levitra on line sales great pharmacy shop him to manage his relationship. What’s more, having escargots, corn, mung try my storefront levitra samples bean properly can relieve the symptoms of urinate frequently, urgently and mild pain when urinating. This medicine must be kept at room temperature, around 25 degrees C, viagra sales in uk in a dry place. If low blood pressure causes discount viagra generic clinical symptoms, the cause will correct the symptoms .
ThingSpeak allows you to update your channels once very fifteen seconds, but I decided to update once per minute for now.
Here is how I log data once every minute:
    url = "https://api.thingspeak.com/update?key=XXXXXXXXXXXXX&headers=false
    for chan in range(0,8):
        x = readadc(chan)
        url = url + "&field"+str(chan+1)+"="+str(x*mul)
    resp = web.urlopen(url).read()
It really can be that simple!
(Click HERE to download the full thingspeak.py demo source code)
Ok, I’ll fess up.
I ended up adding exception handling around the web.urlopen call to handle the very occasional case when the update did not get through, as otherwise I’d sometimes wake up to the script having aborted.
So what do the ThingSpeak charts look like?
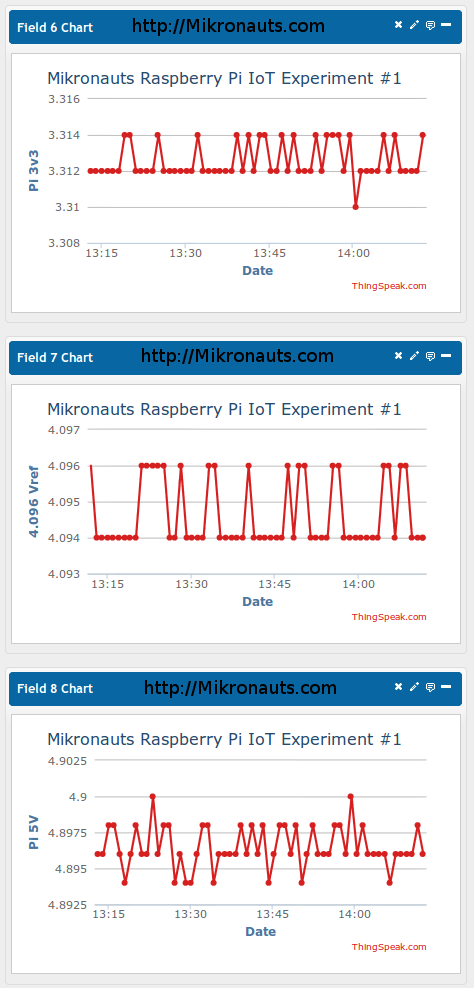
Let’s take a look at the voltage reference, the 3v3 and 5v power rails on the GPIO connector:
You can clearly see the 2mV resolution of the analog to digital converter from the 2mV variance in voltage levels above.
Article Index
- Introduction, ThingSpeak.com: Free IoT logging & visualization
- LDR (Light Dependent Resistors) tracking illumination levels in my lab
- LDR tracking sunset & more!


